Let’s be honest, there have been many times where you had to see your favorite shoes go in the garbage. The truth is, it could have been prevented if you took care of your shoes the right way. In this article, we will show you how you can take care of your shoes properly without losing its value and to enjoy them for years to come. Many people don’t realize that, but once your shoes have been worn off, you can still fix it appropriately without spending a lot of money getting new shoes. You must understand how you can fix your shoes the right way without spending a lot of money. We will talk about all the aspects of fixing a shoe so that you are prepared for the next time you have any issues with your shoes. Keep in mind, most of the shoes tend to break from the sole, which is why we will be extensively talking about shoe glue and which ones we deem to be the best. However, the best way to take care of your shoes is to take care of them from the get-go.
Cleaning Shoes
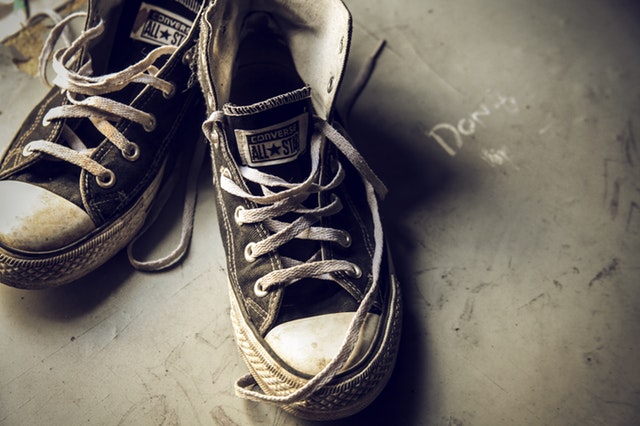
 This means that once you get your shoes, make sure that you take care of your shoes by cleaning them after every wear and do a quick assessment at the end of the night. This will allow you to build the discipline and the longevity that you have been looking for. When it comes to taking care of your shoes, we can understand that you don’t have time to take care of your shoes from the get-go. Most of you are reading this article simply because you have no way of going back in time and taking care of your shoes. That being said, let’s talk about how you can reattach a loose sole as that is the most common dysfunction you will notice once you start wearing out your shoes. Now, if you notice that your shoes are wearing down or the soles are coming off, the first thing you need to do before you apply any glue is to wipe the shoes down completely with a wet paper towel. You can use a wet cloth, as long as you get off all the dirt and dust from the sole you will be okay. Once you’ve got all the dirt from the shoes, make sure you let it dry completely before you proceed to the next step. Please make sure that you clean the shoes as thoroughly as possible. The cleaner the shoes are from the sole, the better chances you will have of rejuvenating it back to a brand-new shoe. Also, if there is any leftover glue on the sole of your shoes, make sure to use rubbing alcohol or nail polish remover to get it off after you are done cleaning the dirt.
Shoe Preparation
This is a significant step, as well. Once you have managed to clean out any dirt or glue from your worn-out shoes, the next step will be to sand down the shoes. Many people who tend to fail with fixing their shoes, they don’t realize how essential it is to sand down the sole. The scratches will give your shoes a better chance of sticking onto the glue, this will make your job much easier and will give you a higher success rate when it comes to seeing the results with you are hoping. We recommend that you use coarse sandpaper, which is between 40 to 60 grit. This is the perfect grit as it will give you the optimal results when it comes to the perfect amount of scratches for the glue to adhere to.
Choosing The Best Shoe Glue
Once  you have managed to sand down the shoes, we will now get to gluing the loose sole. There are many types of glue out there. However, we have narrowed down to some of the top recommended glues that you can use for your shoe repair. There are two types of glue that we highly recommend that you use, the first one would be Shoe Goo, this glue is perhaps one of the well-known glues out there when it comes to fixing shoes. This glue is specifically designed for people who are looking to repair their shoes. If you are looking to get the job done perfectly, then there is no better glue than Shoe Goo, and you can get it on amazon.
![]()
 The next glue we recommend would be Gorilla Glue, although this glue has not been made for shoe repairs specifically it will still work great. This glue will work great on any shoe, and if you are someone who is looking for a very versatile glue, then there is no better glue than the Gorilla glue. This glue also dries very clear, allowing you to have a better look as compared to any other generic glue.
![]()
Shoe Glue Application
Now once you have managed to decide which glue you’re going to be using, make sure that you get a hold of a round paintbrush. using a paintbrush will allow you to apply an even coating on to your sole, hence resulting in a better result when it comes to repairing your shoes. Make sure to fully coat the surface of your sole, so that you keep everything nice and even. Once you have managed to apply glue appropriately, the next step would be to hammer the shoe down. Make sure that you grab a nice and heavy hammer and hit the sole as hard as you can with the hammer multiple times, allowing the sole to stick to the glue. This will allow an even absorption of glue and will also allow you to get the sole stuck to the glue as quickly as possible. When you are hitting the shoe with the hammer, you will have a better result if you are moving around the placement of your hit. More specifically, make sure that you are hitting the sole, which has been coated with glue.
Clamping The Shoe
Once you have done this step, the next thing you will be required to do is to clamp the shoe down for at least 24 hours. This will allow the glue to get stuck onto the shoe. If you don’t have a clamp, you can use a heavy rock to place some pressure. The main goal here is to put some pressure on the glued area, allowing it to stick properly. Clamps tend to work the best. However, if you don’t have access to a clamp, you can improvise. After you have managed to put some pressure on the affected area for at least 24 hours, you should go ahead and have a look at the sole. Flip the sole around so that you get a better understanding of whether the repair worked or not. Most of the time, if you do it properly, it will work. However, if you miss a step or if you don’t use the right glue, your repair may be unsuccessful. Make sure that you follow everything as closely as possible to see the best results with your shoe repair. If you don’t, then chances are you will not see the results you might have been hoping to get out of this repair. Using the right sandpaper, and the right glue is essential. On top of that, if you don’t put enough pressure on to shoes for 24 hours, chances are you will not see the results which you are hoping to get out of the repair. We always recommend that you use a clamp to put some pressure on your shoes. However, you can always improvise and use anything different to put pressure on it. You can use a dumbbell to weigh down the shoes, this step will dictate whether the shoes will be repaired or not.
Final verdict
 The final verdict of this article would be that, for you to see success with your shoe repair. You will not only require the proper steps to see the results which you are hoping to achieve but more accurately, you will need the right glue. The necessity to weigh down your shoes for at least 24 hours once you are done sanding and gluing the sole will dictate your success. You can most definitely fix your shoes at home. However, it does take some practice and time to get it to the point where it is perfect. If you use the right glue, you will have no problem achieving the success on the first try. Make sure you are using the glue we have recommended; these glues have been used by many professionals and have been backed up by results. That being said, you will have no problems fixing up your shoes with proper execution and materials. You will save a lot of money as you will not need buying a new pair of shoes. As the famous saying goes, money saved is money earned and trust us spending a little bit on supplies you will be saving a lot of money fixing your shoes.